Tuesday, July 20, 2010

What I've Been Working On (Part One)

This is post  number 85, which means that there's only 15 (14?) more posts to my 100th post and a giveaway!  Anyways, I've been quite a busy bee in my sewing room!

The first thing -albeit not the first- thing I've been working on is a sew-along called The Ice Cream Social, which is being hosted by Amy from badskirt (I love her blog name, it's so cute!).  Basically, a bunch of folks from around the globe follow along and sew the same thing -or rather in this case, one of three versions of the same sewing pattern- and we just share our progress over on flickr.  The pattern in question of course is the Ice Cream Dress that's made by Oliver + S (the plus should be read as 'and') and it's so awesome and cute!  It comes in sizes from 6M-4 and 5-12 and several people have actually modified it to fit their adult bodies!  I plan on doing this, but I want to get the feel of the pattern first by making the top for Zoe first.  And instead of zipping ahead on the sewalong -something that most people are doing and it's quite okay to do so-  I've decided to instead keep pace with it, just to keep in the spirit of things.  So, far we've sewed together the yoke.  I messed it up a bit and incorrectly sewed the bottom part of the front of the yoke, but I can easily take it apart and fix it.  In the meantime I've got two pictures of my progress.

Her expression totally cracks me up.  I had initially placed the yoke on my design wall to take a picture and she decided to come into my sewing room and be nosy to investigate what I was doing.  The converstation went something like this:

Zoe: Walks into my sewing room. Hi Mommy.  Whatcha doin?
Me:  I'm working on your shirt!  Come here let me put the yoke on you. (like she knows what a yoke is...)  I put it on her.
Zoe: Looks down at the yoke.  I think my shirt is a little small...
Me:  Of course it is, I'm not finished yet.  Let me take a picture!  She then gives me a weird look as I try to take pictures... after the first one she giggles and runs off, I manage to grab her and get the yoke back from her.

She was a bit resistive to me taking a picture, because usually when I take pictures of her without her asking she knows they are going to go on the internet.  I tried to get her to smile and would have been perfectly okay with posting a picture of her with her version of smiling, which is her pulling a weird face and sticking her tongue out sideways and squinting funny.

Wednesday, May 26, 2010

Ibolya the Lonely Matryoshka and a Minor Correction

I miscounted, and this is actually post number 77.  I fail at counting.

Moving on.

One of the blogs I follow is the 'official' blog for DMC floss.  Well, the other night I came across a post about a stitching contest; more specifically "Rainbow of Stitches" contest being hosted by Feeling Stitchy.  Basically you do a bit of stitchery based on 9 different categories and then you enter them into their Flickr pool.  Each category is a color of the rainbow, plus pink, black and white.  By the time I found the post on the DMC blog, there was less than two weeks left to enter -deadline is Memorial Day- and I wanted to do something that would be striking, yet simple enough to put together.

The first thing I did was pick the category I want to do.. basically the main color of my submission, and I picked purple violet.  Then I thought about the subject.  At first I thought it would be cool to do a hedgehog themed entry; however I'm not that awesome at drawing them, and while I could use the same hedgehog I've used previously on other projects, I wanted to do something original.  My other addiction at the moment are Matryoshka -also known as Russian Nesting- dolls.  I had gotten bored about a month or so ago and decided to sketch one out.. so I did.  I decided on a whim to go ahead and trace her out onto some fabric using a water soluble marker and go to town!
This is the first mid process picture I took.  You can kind of see how unmirrored the image is, I eventually filled her in NOT using these line as a guideline.  the faded line under her chin was where the original chin-line was at.  This was quite rough and the end product looks quite different.  The stitches I used in this portion are as follows:

The outline for her hair was done by alternating granitos and a backstitch.  the right side of her hair is filled in with french knots and running stitch.  The left side of her hair is a granito and french knot flower, and of course running stitches.

Her entire headscarf is done in a couching stitch using Ecru as the base thread and DMC # 211 as the couching thread.  As you can tell in the picture, you have to do this method with two needles, or spend time switching back and forth.  Using two needles was easier for me.  I'm VERY sure that her hair was done using DMC # 898.  The flower in her hair was done with DMC # 327.

Here's a closeup of the upper half of her body.  Her eyebrows, eyelashes are done with the running stitch; and her beauty mark is a french knot all done in the same color.  Unfortunately I don't know the exact number of the color since when I bought the skein -among several others- I did not have enough spool thingies to put my floss on, I left it still intact and my daughter ended up getting into my box of floss and she lost all of the wrappers.  There's now flosses in my box that are wound with no numbers because I have no clue what the numbers are.  The flesh tone is actually DMC #3770, and it was all done in a running stitch.  Her eyes are done in a deep dark green; however I've misplaced the spool labeled with the number so I can't give that to you.  The little flower detailing on her headscarf was done with #210, #327, and the greenery is #989.  That was done in a combination of granitos (flower) and a running stitch (greenery)  Her torso was outlined in a running stitch using #327 and alternating at a slant, the 6 pointed cross stitches were done in #327 as well as #210.  Oh, and her lips were done in #817.
Here's the finished project; all framed up nice and neat.  I took the glass out to photograph so there's no glare.  Her skirt is actually reversed appliqued and is actually a scrap of the Liberty of London scarf I bought from Target on the Friday before Mother's Day to make myself a top -speaking of, I need to blog about that- and the apron and apron strings were some bits I inherited from Jeff's grandma when she passed away in 2007... apparently I'm the only crafty person in the family.  The apron was quite easy to reverse applique because the white fabric is actually double layered which is why you are not seeing the shadow of the dark threads crossing back and forth.. trust me though they are there! *Edit:  I forgot to mention that the Liberty fabric is sandwiched between the two white layers, I had basted it down to the bottom layer of white fabric and then sewed it on my sewing machine, and then I carefully pinched up the white, made a snip and went to town to cut off the top white layer to reveal the skirt under. 5/27

Ibolya is named so because I wanted to find a foreign -to me anyway- word for "violet"; and I believe it's Hungarian.  I honestly do not know if it's referring to the flower or the color if it's even used as a first name in Hungary, but for all points and purposes it fits her exactly.  She's currently framed in some awesome paper so the space showing is 5 by 7 and she's in a 8 by 10 frame.  The actual cut size of the fabric is larger; however until I can figure out what project I want her going on she's staying put inside the frame.  She's currently resting on a cabinet in my sewing room;  however after I get around to putting the glass back on and picking a spot she's gonna go on the wall.

There's not many entries for the Violet category -I hope I'm not jinxing myself here- so I'm crossing my fingers that I make it to the final 9 -basically first place in each category.  That would be pretty awesome!

Tuesday, May 11, 2010

Every Quilt Has a Story

And in the case of this (not yet made) quilt, it even has a journey!

It all starts innocently on a Wednesday afternoon in March (the 24th to be exact) and I had just recently discovered a store on etsy through a blog (jaybird quilts if I'm not mistaken) and I came across Anna Maria Horner's "Little Folks Voile" fabric in her shop.  Chatting with my friend Nay, I asked if she thought I should buy the bundle.  She said go for it, and so I did.. plus I bought some really cute ribbons!  What was great is that she lives in my city and was kind enough to do a local pickup.

So, anyways, one touch of the buttery softness of the voile and I was hooked!  I decided I wanted to get at least one fat quarter or at the very least 1/4 yard of each fabric in the line.. all 28 of them.  However, we were due to leave on our vacation in the next few weeks, so I didn't order anymore offline.  I did however, take the 10 fat quarters I already had with me, in the hopes of being able to stop and buy some more on our trip.  The tricky part of my plan was A) convincing Jeff to stop and B) finding stores on our route that carried her fabric, since according to her website only 18 brick and mortar stores carry it in the United States.

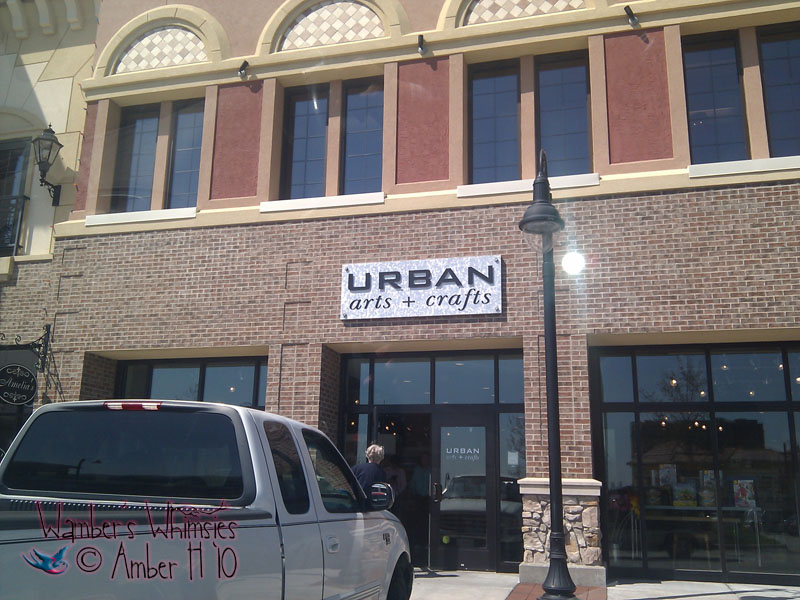
Luckily, on our way to Virginia we were driving through Kansas City, Missouri and there's a store called Urban Arts + Crafts that was JUST off the interstate and Jeff consented to stop!  I had the sense of course to call ahead when we were about an hour out of the city to see if they had any, and of course they did.  I ran in, waving my bag of fat quarters and explained that I was planning on purchasing more of the fabric, but was wanting to avoid duplicates, and that's why I was bringing it in.  Had I had more time I would have LOVED to browse the store, but we were on a super tight schedule.  I was able to buy 4 more pieces of the collection, and after taking a potty break and clearing out some trash from the van -the shopping center/strip mall had public bathrooms so we took advantage- and we were on our way.  We got a bit lost getting back on the main interstate but it was well worth the stop!  Or at least I think so anyway.  I should add that customer service was fantastic and I highly recommend if you're in the area to go stop and visit.  It's a really beautiful store and I love how they have each type of craft in it's own corner; very neat and tidy and very open.

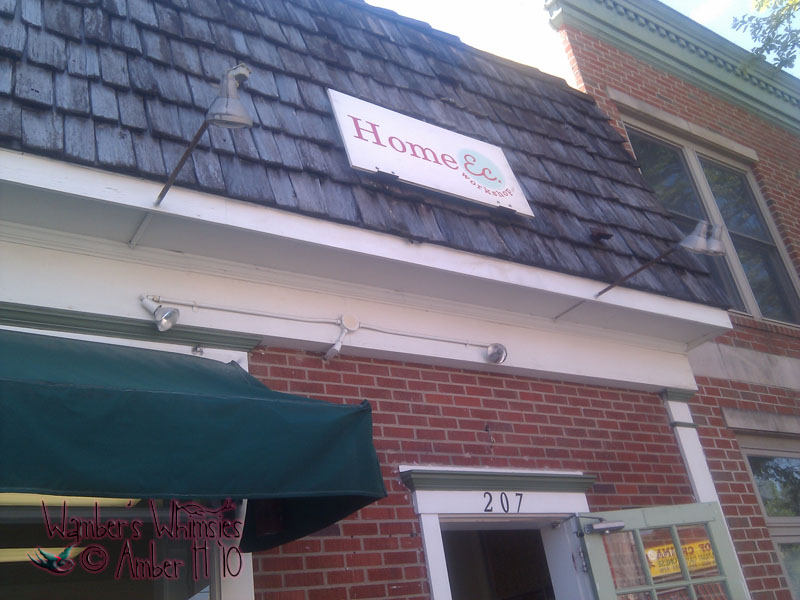
Unfortunately, there was no stores in the state of Virginia that carried her fabric, and thus we headed home.  However, on the way home we drove through Iowa City, Iowa and of course since I discovered there was a store there called Home Ec, we stopped again.  It wasn't quite just off the interstate; I think we had to drive about 3 or so miles into the city to get to the store.  After paying the meter, we all headed in.. since it was time for a pit stop anyways.  Again, I walked in waving my bag of fabric, and was able to purchase two more 1/4 yards.  Of course, once again I called ahead and made sure they had it.  And they had the fabric I needed and more... they had a decent selection of Japanese imports in fabric and ribbons... I didn't take the time to look around at EXACTLY what they had, but I was able to take a cursory glance.  Had we had the funds, I KNOW I would have easily walked out spending around $100.. because in addition to fabric, they also have yarns and in addition to sewing, I enjoy yarncrafts such as knitting and crocheting.  Alisa -the gal who helped me out- was awesome and even said if I wanted to call back later in the summer when they restocked in Anna's fabric, they would be more than happy to ship some to me!  Of course silly me forgot to ask when approximately they were going to get it back in stock; however based on what I've read online, the company that prints her fabric will be pushing more out later this month, so I'll probably end up calling or writing an email next month inquiring after it.  I was briefly browsing their selection, saw some very hard to fine Heather Ross fabric and regretted not purchasing any while I was there, so last week I called and I now have 1 and 2/3 yards of one of the prints from her Rabbits and Race Cars line on it's way to me.  I bought the rest of the print they had, so it's gone.. muwahahha.  And in addition to yarns, fabric and other types of craft stuff, they also have a little cafe/bakery inside of the store.. which smelled absolutely scrumptious.. but we didn't buy anything from the bakery.  Maybe someday if we're ever in the area again, I'll be able to stop in and sample some of their wares.

I bet you're wondering what my collection of the fabrics look like so far.. so here it is.
I should have labeled the picture with letters or numbers to indicate which of the fabrics I got from where, but alas I didn't.  But so far I have 16 of the prints, and I'm on a quest to get the last 12 that I need.  Of course I'll update when I get more!

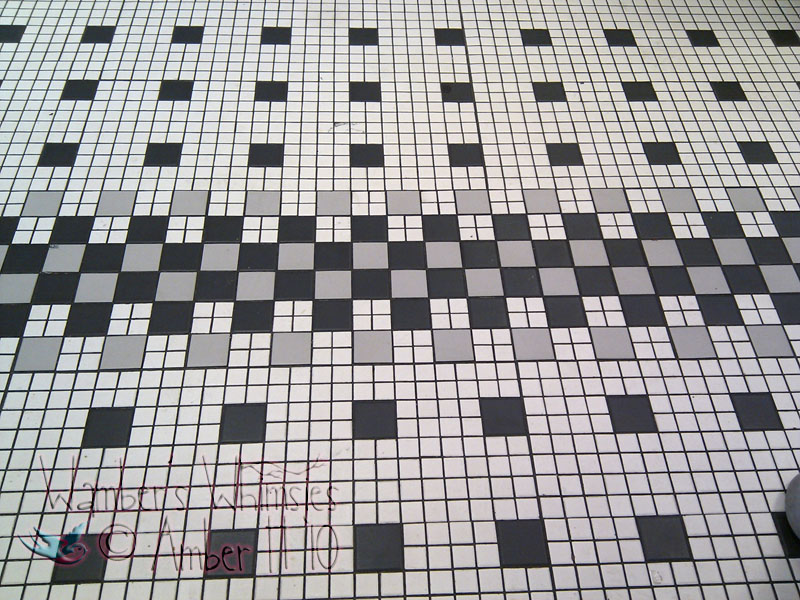
Oh and if you're wondering what I'm going to do with them.. here's a hint... That's the floor of the Steak and Shake in Dayton, Ohio that we ate dinner at when we stopped in Dayton for the night on the way to my sister's house in Indiana.

That's all I'm sayin.

Monday, May 10, 2010

Sentimental Post

We've been back from our trip to Virginia for a week now, so I figured it would be a good time as any to start blogging about the trip.  I'm going to do this in chunks, and I wanted to start by blogging about my first sewing machine.

My dad still had it, and I decided to just leave her in Virginia with him.  That way he has one as well if he needs it for some reason.  Yes, my dad sews.  So what?  It's just one of many power tools he knows how to use!  Oddly enough, my mother couldn't use a sewing machine to save her life...

Anyways, I had the presence of mind during the packing frenzy to snap a picture of it before we left.  I was going to drag it outside to get a picture in natural light, but it was drizzling outside and I didn't want to get any strange looks.

Like I've said before, my first machine was a Babylock, one of the reasons why I currently own a babylock.. this one has been through the mill and is currently out of commission; however my dad has a friend who used to repair sewing machines for a living, so he's going to have him take a look at it and fix it for him.  It's so cool, it can use a double needle for sewing!  My dad was trying to remember how much he paid for it; however he doesn't remember.. he thinks somewhere between $100 and $200 ($143 to $286 adjusting for inflation in case anyone is nerdy enough to want to know)  He kept asking me but he NEVER told me how much he paid for it.

She's held up pretty well over the years since it was purchased in 1994, and as much as I would have loved to bring it home and fix her up and use it, I decided to leave it behind.  Mostly because we didn't have the room for it.

I'll end up getting it back anyway someday so it's all good.

Friday, April 2, 2010

More Hedgies and other stuff

More hedgies.. shouldn't be a huge surprise there!  (For whoever actually reads this blog)  This time, they've been converted to hair accessories!  Aren't they cute?  I made these out of some scrap fabric from Ruthie's quilt fabric, a button-covering kit made by Dritz -which can be found at Joann's and various other places on the internet-, wool felt that I purchased from a local shop, and some snap hairclips I bought from Robert's -a local crafting supply store here in Utah and of course, plus my sewing machine, and a hand sewing needle and some thread, and a hot glue gun.. something I almost never use for anything.

The petals were actually made by me tracing the half circle template that's for the buttons; basically I just lined it up on the edge of my felt and just traced it with my water soluble pen and then cut them out.  The original tutorial tells you to use a full circle, cut them in half and go at it, but I cheated and just did half circles.  This project is particularly why I desire to buy a multi sized circle die for my cuttlebug, so I can make neater looking circles.

Anyway, once I had the petals situated and the buttons made -a tutorial can be found here; which incidentally is also how I found the petal tutorial-  I went ahead and warmed up my glue gun, and then I filled up the back part of the button with the hot glue, and then making sure I had them lined up properly, I put the  petals onto the back of the button.. you pretty much get one shot at it I think.  Because the buttons are basically made out of aluminum, they conduct heat quite well, so you kind of need to watch your fingers a bit so you don't get burned by the hot metal.  It's not give-you-a-blister-hot but I am aware that people may have a lower tolerance to heat than I do.. I'm famous for taking scalding hot showers after all.  Then, I used the white bottom of the button kit, and used that to trace a circle to cover up the center of the back of the button, and then I took a rectangular scrap and took that to my sewing machine to sew a cuff of sorts so I can change them from being lefties or righties.  What can I say? I'm cheap!  Anyways, after sewing the little cuff to the circle, I whip stitched that to the back of the flower and presto! It's done!

 The one thing I'm not entirely a fan of is you can see the shiny metal under the weave of the fabric.  I think I could probably double up the fabric.  However I haven't tried this yet, so I don't know how well it would work. If I do try this out, more than likely I'll do it with white fabric, to keep it from distorting the color of the top fabric.  Also, according to what I've read, using acrylic felt with this isn't ideal, because there's the possibility of the felt melting if you use the less-expensive stuff. I do know that the wool felt doesn't shed as much as the less-expensive stuff as well, which is another plus I think.  Nothing like felt flakes and fibers all over your hair to ruin your day, especially if the felt you're putting in your hair completely contrasts with your hair color. If you don't have a local shop that carries non acyrlic felt, Lollychops mentions this website as her source of good felt.  I cannot offer my opinion of them however, since I've never used them.  However, I have browsed their site and I can say they do have a nice selection of colors and types of felt, and the prices are what I'd consider to be fair.  And plus, it looks like they are now also offering felt in a bamboo/rayon blend so that's perfect for those who have allergies to sheep wool.  They don't have very many colors in the bamboo blend, however I'm sure more's to come.  And they also have eco-felt as well as another option; which is made from plastic bottles for those of you who are green-minded.

Friday, March 26, 2010

First Block For Ruthie's Quilt

Well, I was very successful in my endeavor to turn hexagons into a quilt block without having to do half hexagons, and it came out super well I think!

Now, don't get me wrong, I have nothing against half hexagons.  They appear to be super easy to quilt with; however because I didn't want to break up the hexagon pieces, especially of the hedgies, I kept them in one solid piece, which made it slightly more difficult to sew.  From start to finish -not including ironing, embroidering the hedgies or washing- it took me about... 2-4 hours.  I wasn't strictly keeping track and quite honestly I had a TON of interruptions.  But I'm REALLY happy with the end result!  The trick of these were to trace the 1.5 hexagons with the water erasable marker, and then cut them with a 1/4" seam allowance.  and then only machine sew on the traced lines.  I should have taken a picture/do a tutorial of this... maybe I will with the next hexagon block I do!  This quilt is going to feature a bunch of them.  Placement is very very important, and constantly checking to make sure if your fabric's pattern is going the correct way is as well -if you care- as well as ironing the seams is integral as well.  I discovered for hexagons, you HAVE to sew the seams open!

To be honest, I was mostly winging this.  I started out by laying out the fabric on my cutting mat to get an idea of how I wanted to do the blocks.  The key to working with hexagons is that you do a 'flower' and then just work around that. start in the center and work your way out basically!

Here's the completed -but not squared- block.  There was no real rhyme or reason to how I laid out the hexes -with the exception of the gray and white blocks, I put them in the corners on purpose- except that I followed the rule of threes.  Basically I did not let more than three of the same fabric touch each other at once.  Granted, I didn't completely follow this rule since there's only two periwinkle hexes along with only two embroidered hedgehogs, but I think it still creates an interesting looking block, because somehow it works.  Or that's what I'm telling myself anyways, I'd be interested to know your opinions.

And of course, here's the squared off block!  It measures 10.5 inches wide by 13.25 inches tall.  There was a few issues with puckering in the corners where the hexagons meet, but other than that it lays pretty flat.  Ruthie got pretty excited when Jeff showed it to her, and explained that it's going on a blanket for her -it's sitting on my bin of fabric ontop of the ironing board- and she got grumpy when he told her she can't touch it.  Then she tried to sneak over with a step stool to pull it down.. I think it's gonna have to go into my bin before she tries THAT again.
Here is a closeup of the hedgehogs.  I angled it since it's easier to see the detailing of the girl hedgies and beacuse it's an artistic photograph.  I did the girl's hairbow, eye and nose in DMC #327, and there's an H instead of an R in her heart.. I figured including first and last initials would really personalize it for her.  All I did was just trace the hedgie in the water soluble  marker for the girl hedgie, and because it kind of bled through I was able to follow the outline pretty easily.  Her hairbow was done using the lazy daisy stitch/detached chain stitch; the tutorial found here -by the same lovely lady who did the french knot tutorial I used and showed you in my last post-

I'm really excited about finishing this quilt.  I will be showing my progress; however it may be interupted since we're taking a road trip after easter and I won't be taking my juki with me which makes me sad, because I've got a foot for my machine that has a foot with a build in bumper for 1/4 seam allowances.  Oh well!  I'll be taking my babylock, but I most likely will NOT be sewing anything for this quilt with it.. I've learned when you use two different machines for one project, it's very obvious.

Monday, March 15, 2010

Latest Quilting Project from Start to Finish

Like most awesomely cool things that turn out well, it started with an idea.  I recently found this fantastic blog called Film in the Fridge, which features -among others- a really nifty tutorial on string quilt blocks.  I'm not entirely sure what or why it's called a string quilt, but I like the end result!  Ashley's got a ton of super awesome talent with quilting, and is quite inspirational with her work.  In addition, I was also inspired by her baby birds and butterfly quilt.  It's done in log cabin blocks, but instead of following traditional log cabin-ing work, she defied tradition and went for a more whimsical wonky look for her log cabin squares.  And so a quilt was conceived.

I designed a quilt that will be alternating string blocks with a wonky log cabin block for Ruthie.  I found some great fabrics to come together, and I'm in the process of acquiring the fabrics.  However, I have picked out the fabrics online.  The top two are from Amy Butler's Lotus line of fabric; the left one is Wall Flower in Cherry, and the one on the right is also Wall Flower in Sky.  The browns aren't done by the same designer; the one on the left is Michael Miller is called Etta and is in the toffee color.  The brown on the right is Riley Blake and is from the All Star line, and is Firecracker in brown.  The next two fabrics are from Heather Bailey's Nicey Jane line; the left one is in pocket book tangerine, and the other one is in pocketbook green.  The next two are probably my most favorite fabrics that are going into this quilt.  They are from his Hedgehog Group line, and the left is Hedgehog Heaven in aqua, and the right one is in gold.  The last two are also Riley Blake and I believe they are from the all star line as well, but I'm not entirely sure.  But it's tone on tone orange circles, and tone on tone red circles.  In addition, I'm also planning on adding a solid fabric, however, due to the fact that I don't have ALL of the fabrics yet the solid is still undecided.  I was thinking of a green of some type and plan on getting it in a Kona cotton; but I want to wait until I've got all of my fabrics.


Quilt Top
Quilt Back

Since I'm planning for the quilt to be a good quality one and hopefully last Ruthie a very long time, I figured it would be an excellent idea to do a test run of some sorts.  After drawing out and coloring the design in my sketchbook, I went ahead and cut out the fabrics and sewed the blocks together.  What was nice about doing this, I was able to figure out exactly what size strips I would need for the quilt, and was able to make notations in my sketchbook.  That way, when I do the final product, I know my measurements and I won't be guessing.  Well, once they were done, I went and grabbed some polyfill batting I bought ages ago for some other projects that never got done.  I actually discovered that it's much easier to use 100% cotton batting, such as Warm N Natural or other stuff, and I do not plan on using polyfill for a serious project ever again.  It is ideal for practice projects like this, so I will keep it until I've used it all.  I realize that the strings are not perfectly lined up; Which is okay considering this is like I said; a practice piece.  I think the reason why they didn't line up is because when I drew my line on my paper squares, they were not perfectly corner to corner.  Of course, when it comes to doing Ruthie's project I will be making sure that they are lined up properly.  After using curved safety pins and quilting it, I trimmed the batting down, and cut the strips for the binding.  Thanks to my friend Nay of Nay's Needlebook, I was able to do -mostly- mitered corners following the directions on this tutorial.  Granted, I didn't do all the prewashing and that jazz, but I followed the directions for the french binding with mitered corners.  If it's done right, it comes out beautifully.  For those that are curious, I used my Babylock Xscape for the piecing, and I used my used new Juki, model number TL-98 Q to do the quilting.   I had a lot of fun using my juki for this project, since it was the first time I used it.  Seriously, it makes quilting MUCH easier, and while there was a bit of a learning curve with figuring out how to thread the machine, and winding a bobbin, one I figured it out, it was smooth sailing sewing!
Closeup of quilting.

The Juki in action!
And of course, here's the end result:
The front completed and bound.

The back completed and bound.
I suppose I could have taken it outside to get better pictures, but It's been kind of snowy and wet outside, so I didn't really want to.  I really did have a lot of fun with working on this and I can't wait to get started on Ruthie's quilt!

Monday, February 22, 2010

Two New Blogs I Found This Week!

Last night -or early this morning, depending on how you like to look at it- I'm pretty sure I mentioned that I wanted to continue my post, however my thumbs were getting tired.  Well, it was more like my forearms and biceps.. I'm probably gonna end up buff from all of the thumb typing I've been doing.

So, the first blog I found was a blog I came across on either Thursday or Friday, called "Made By Rae".  I was discussing bag making with my friend Nay -who now has her VERY OWN blog!- and she somehow was able to give me the link to Rae's blog.  Her blog is sewing themed, and I immediately started following it.  She has a few various patterns on her blog, free as well as ones to purchase the licensing to make bags from her pattern and then to sell them.  She has some free patterns but they are personal use only.  I liked the look of her Buttercup Bag, but of course before I commit and spend the $10 for the license fee, I wanted to take the pattern for a test drive!  So I did!   I realize it's not the best quality picture, but since I wanted to finish writing the blog, rather than waste time nitpicking the picture of the bag, I went with this one.  As you can tell, it's quite different than her bag.  I used a solid brown color for the top part of the bag, and the straps have tabs on them -not sure why I did this actually- and the strap is made with the same fabric as the inner lining, and features a knot since it's in two pieces.  I also added some decorative stitching on the top part in variegated pink thread.  Since I was just experimenting with the pattern to see if I could do it, the fabric is quite wrinkly.  My favorite part of the bag is the green fabric I used as the lining and the straps, but especially how the fabrics don't really match, yet somehow it works out.  I adore the green fabric and I do plan on going back and purchasing more of it.  The neat part about this bag -in the smaller size anyway- is that it can be done with two fat quarters and a little extra.  I highly encourage you to check her website out!

The next blog I found was in the wee hours of Sunday morning, just after midnight.  I went searching for a tutorial on pleating.  Now, before you get any crazy ideas in your head that I don't know how to pleat, get them out!  I DO know how to pleat -otherwise I wouldn't have been able to make the bag you see above- but I wanted to find out if there was any magic mathematical formula regarding pleating and reducing the inches down.. something like this... x size pleat * times y pleats = total inches reduced to equal new width.  That actually makes more sense in my head...  Anyhoo, the first thing google popped up was this tutorial.  I knew enough that smocking was kind of in the other end of the spectrum for the type of pleating tutorial that I was looking for, but I didn't care.  I always had an interest in smocking, but it wasn't until I came across Marie Grace's blog that I was hooked.  Her blog isn't really about smocking exclusively, it's actually a blog primarily about knitting, but she also shares stuff about her family, sewing, quilting, and smocking projects as well as her goats and other animals.  I was instantly drawn in, and I laid in bed  reading her blog for about 2.5 hours (or more) before I looked at the time, realized it was after 3 in the morning, put my phone down and went to sleep.  I recall having a pleasant dream, and despite only getting 5 to 6 hours of sleep -I need at least 8 or 9 so I'm not a grumpy ogrette- I woke up quite refreshed and spunky, something I highly attribute to reading her blog right before falling asleep.  Don't misunderstand, it didn't BORE me to sleep, but I knew if I didn't stop where I was, I was going to be up until 5 trying to finish reading her entire blog.  I know I got as far as May of 2008, and I plan on finishing reading her blog.  I left a comment on her blog, and woke up to a very kind email to which I responded to.  She's awesome!

Oh, and I never found a magical formula for pleating.  I decided to dart the fabric instead, which is the shell for a purse I'm designing.

My Upteenth Goal to Blog More


I realized when I posted this orginially one of the pictures wasn't working like it was supposed to.  I was planning for these two to be placeholders anyway, so they're now changed.

Well, this is my first attempt to blog from my shiny new cellphone. It's an experience into itself so hopefully, it actually works the way I want it to, so I can blog more.

Well, a few new things I feel like blogging about! I recently -and also successfully I might add- finished my very first quilt that didn't look like it belongs in a Salvador Dali painting! It was a baby quilt that I gave to my sister-in-law as a gift for baby D who is officially due on March 3rd, but will probably come sooner than that; we'll have to see! Here is a picture of Jessica holding the quilt up. My favorite part of this is that you can see her cute bump poking out a bit.


And of course, I also had to make a diaper cake! I can't help myself, they are really cute and fun to make. Plus, there's also a wow factor involved as well.

Cute, isn't it? I like to think so!

Speaking of quilting, this week I got the deal of the century! Here's how it happened. I was browsing on the local classifieds looking to see if anyone was selling beads. There wasn't unfortunately, or at least I didn't get far enough to see. Anyway someone was listing a quilting machine and quilting frame for an awesome price! I had planned on buying one eventually, however it was a deal I could NOT pass up! Right now, it's in pieces, but after our road trip, I plan on setting it up and using it. We're probably leaving in about five or six weeks and I figured there is no point in starting a project now and having to abandon it for a whole month I know that would drive me insane! Hopefully, while we are on the road I can find small privately owned quilting shops and add to my stash of fabric. Once we get our route mapped out, I can do some research of stores we can stop in. Can't wait!

I was also planning on discussing my etsy shop in this post, however my arms are getting tired from thumb typing and it is rather late, so I will post later today on that... it is almost an hour into Monday after all!

(To be honest, I'm shocked I even made it this far!)